
Venue seat commentary
Sanga Stadium by KYOCERA: Start with Sanga’s published front-row distances
The operator gives pitch setbacks of 8.5 m at main, 7.5 m at back and 10.5 m at the goal ends, plus a 1.2 m front-row floor. The model uses these front lines and floor; later steps and upper elevations remain estimated. The 126 × 84 m figure is the whole field area.
This is a sample model by area. M-rows and seat numbers locate samples within the model and do not match real tickets.
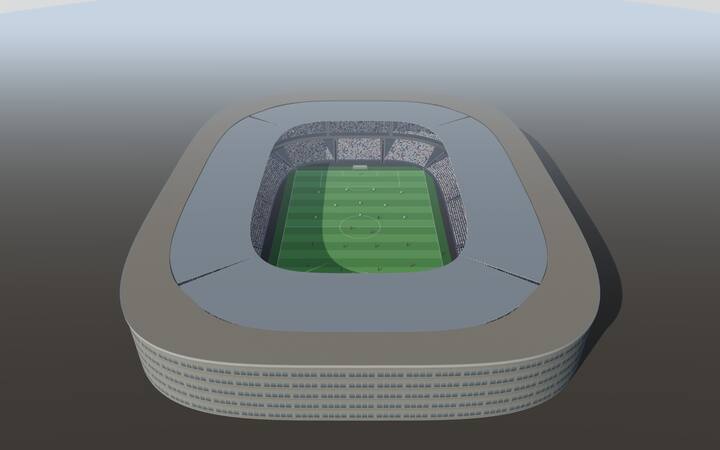
Start with Sanga’s published front-row distances
The operator gives pitch setbacks of 8.5 m at main, 7.5 m at back and 10.5 m at the goal ends, plus a 1.2 m front-row floor. The model uses these front lines and floor; later steps and upper elevations remain estimated. The 126 × 84 m figure is the whole field area.
Compare matching M rows in central main and back, then move behind a goal. Close front lines do not eliminate differences in height and people ahead. A roof projecting 2 m beyond the front row also does not model wind or rain direction.
Compare M-row samples; verify tickets with the official guide
M rows and numbers identify model samples, not actual tickets. Compare central main and goal-end views at 55°, full attendance and everyone seated, then change the posture of people ahead. A/B identify the two model ends, not compass directions or home/away allocations.
Sanga Stadium by KYOCERA at a glance
- Seats in the model
- 22,860
- Zones and sections
- 8 zones · 24 sections
- Distance to Center
- 42m ~ 94m
- Downward viewing angle
- 1° ~ 14°
- Average obstruction, full house seated
- 3.4%
- Seats under a roof or upper tier
- 100%
- Zone closest to Center: Back stand Level 1 (백 스탠드 1층) (about 42 m)
- Farthest zone: Behind goal B Level 2 (골대 B 뒤 2층) (about 94 m)
- Least obstructed zone on average: Behind goal B Level 1 (골대 B 뒤 1층) (1.5%)
- Most obstructed zone on average: Back stand Level 2 (백 스탠드 2층) (5.3%)
- Halfway-line player size, largest zone: Back stand Level 1 (백 스탠드 1층) (average 1.9°)
View summary by zone
Every seat placed in the V-See model is computed, zone by zone. Distances are measured to Center; angles are taken from seated eye height looking toward Center, and negative values look upward.
Obstruction is the average share of view targets hidden by people in front, rails and structures when every seat is filled and seated. Halfway-line player size is the average angle their height takes up in your view; a thumbnail at arm's length is about 2°.
| Section | Seats | Distance | Downward viewing angle | Halfway-line player size | Avg. obstruction | Clearest section |
|---|---|---|---|---|---|---|
| Main stand Level 1 (메인 스탠드 1층) | 3,216 | 43m ~ 74m | 1° ~ 7° | 1.9° | 3.9% | MAIN 1 M3 · 3.3% |
| Main stand Level 2 (메인 스탠드 2층) | 3,276 | 59m ~ 89m | 8° ~ 14° | 1.5° | 4.3% | MAIN 2 M3 · 3.6% |
| Behind goal B Level 1 (골대 B 뒤 1층) | 2,208 | 63m ~ 79m | 1° ~ 5° | 1.5° | 1.5% | END-B 1 M1 · 1.4% |
| Behind goal B Level 2 (골대 B 뒤 2층) | 2,730 | 79m ~ 94m | 7° ~ 11° | 1.2° | 2.2% | END-B 2 M1 · 2% |
| Back stand Level 1 (백 스탠드 1층) | 3,216 | 42m ~ 74m | 1° ~ 7° | 1.9° | 4.8% | BACK 1 M3 · 4.1% |
| Back stand Level 2 (백 스탠드 2층) | 3,276 | 58m ~ 88m | 8° ~ 14° | 1.5° | 5.3% | BACK 2 M3 · 4.4% |
| Behind goal A Level 1 (골대 A 뒤 1층) | 2,208 | 63m ~ 79m | 1° ~ 5° | 1.5° | 1.5% | END-A 1 M3 · 1.3% |
| Behind goal A Level 2 (골대 A 뒤 2층) | 2,730 | 79m ~ 94m | 7° ~ 11° | 1.2° | 2.2% | END-A 2 M3 · 2% |
Seat counts in the model can differ from published capacities. Unmeasured dimensions are estimates, so use these figures to compare trends.
Sources for this model
The venue's shape and figures come from facts confirmed in the sources below, with estimates where they could not be confirmed.
Sources are shown in their original wording.
- 2026/27 리그 입장 가능 수 21,293명: https://www.jleague.jp/club/kyoto/ (조회2026-10-24). 시설 총수용·당일 판매 수와 정의가 다르며 개최 대회별로 변할 수 있다.
- 공식 시설 안내: https://sangastadium-by-kyocera.jp/stadium-guide/overview (조회2026-10-24). 운영사 공표 약21,600명·최전열 바닥1.2m·메인 피치 이격8.5m/백7.5m/골뒤10.5m·앞으로2m 돌출한 지붕. 해당 앞선과 바닥을 적용하고 열 단차·지붕 높이는 추정한다. 126×84m는 필드 전체다.
- 추정 표본(2026-10-24): 105×68m 경기선을 공통 가정한다(별도 공표 출처가 있는 경우 제외). 잔디 전체 면적과 경기선 규격은 다르다. M구역·열·번호·경로·층 단면·단차·통로·난간·캐노피 높이·앞 경계·외벽·색은 해석적 추정이며 도면·사진·다른 시야 서비스에서 추출하지 않았다. 실제 티켓 번호·특수석·휠체어석·임시 설비는 미검증. 공표 입장 가능 수와 모델 좌석 수는 별개다.
- 태양용 위경도는 구장 근방 근삿값, -Z 방위는 추정이다. A·B는 모델 양쪽 골대의 구분으로 방위·홈/원정 응원 구역을 뜻하지 않는다. 일조·비 가림·통풍·지붕 개폐를 보장하지 않는다. 일본과 한국은 UTC+9이며 같은 시각을 사용한다.
Help improve the model with your own photos
Please send seat-number evidence through feedback. Photos are not attached to model samples.